
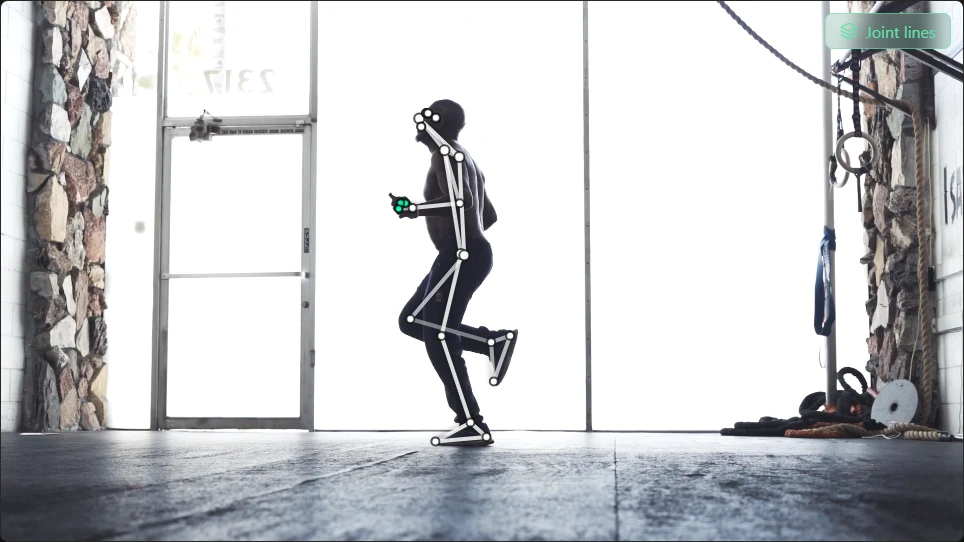
When a signal looks noisy or implausible, the problem often started with the recording, not the graph. Markerless systems need enough visual information to estimate landmarks consistently. That means camera angle is not a cosmetic choice. It is part of the measurement setup.
Match the view to the movement question
The simplest rule is to record the movement plane you care about most. If you want to study squat depth, trunk inclination, or knee flexion timing, a side view often makes those changes easier to inspect. If you care about left-right symmetry, frontal-plane control, or obvious valgus patterns, a front or rear view may be more useful.
Keep the full body in frame
It sounds obvious, but this is where many clips break down. If the feet leave the frame, lower-limb timing and ground-contact interpretation become harder to trust. If the hands disappear behind the torso, upper-extremity estimates become more fragile. Full-body visibility is the baseline requirement.
- Leave margin around the subject instead of cropping tightly.
- Record enough lead-in and follow-through to capture the whole movement.
- Avoid panning unless the movement truly requires it.
Stability matters more than drama
A cinematic moving camera may look good, but a stable one usually produces cleaner analysis. Camera shake changes the background, the apparent motion of the subject, and the consistency of the body outline from frame to frame. For teaching and research workflows, a tripod or stable support is worth more than a stylish angle.
Use lighting that preserves body shape
Backlighting can wash out clothing edges and reduce visible contrast between the person and the environment. Low light can introduce noise and blur. The goal is not perfect studio lighting; it is simply a clear outline of the body and the key segments you want the model to follow.
- Prefer even light over dramatic shadow.
- Avoid blown-out windows directly behind the subject when possible.
- Choose clothing that separates reasonably from the background.
Think about occlusion before you record
Occlusion is when one body part, object, or person blocks another. In practice, that means hands behind the torso, feet hidden by equipment, or overlapping athletes in a shared frame. Even a sophisticated model may keep producing a smooth estimate through occlusion, but smoothness is not the same thing as strong visual evidence.
A good clip should survive frame-by-frame review
Before you trust the exported signals, scrub through the clip and ask a simple question: can a human observer still follow the body motion cleanly frame by frame? If not, the model is also working under reduced information. This is especially important around the moments you care about most, such as peak knee flexion, landing, toe-off, or a change of direction.
What to fix first when a clip is weak
- Widen the frame so the full body stays visible.
- Switch to a more informative plane of motion.
- Stabilize the camera.
- Improve lighting or background separation.
- Repeat the trial before over-interpreting a compromised signal.
Why this matters in class and research
Better recording makes the analysis easier to teach. Students can connect the overlay to the movement more confidently, and researchers can spend more time interpreting signals instead of explaining away preventable capture problems. Good camera choices do not guarantee perfect outputs, but they dramatically improve the odds that the model has something useful to work with.